Saturday, October 31, 2015

No pumpkin on my porch

So here we are again, October 31.  If you know me in person, you know that this is just another day to me.  

It’s not that I hate costumes.  Yes, my kids dress up, any day they want.  And I’m a seamstress by trade and a very resourceful person, so I can make some truly awesome costumes.  Just not for this day.

I love bats.  And spiders (from a distance, and not in the house).  And cats.  I tend toward “goth” and find beauty in dark places, all year.  But not for this day.

Yes, we eat candy, though we have to be kinda picky about what kind.  We may eat some today.  But not because we pilfered it from our neighbors.

So what is my problem with Halloween?  You didn’t ask, but in case you were wondering, I’ll tell you:  It’s not far enough from its origins.  Yes, most holidays started as pagan celebrations.  Some have been “redeemed” - made into something else.  Easter is an easy one - a celebration of new life in spring became a celebration of the resurrection of Jesus, and the new life we find in Him.  Valentine’s Day - God is love, so that’s a given.  Christmas is a little farther fetched; it’s not even close to the day Jesus was actually born.  But since we don’t really know the date, we oughta celebrate it sometime.  

But no matter how I try, I cannot figure a way to equate the ideals and practices of Halloween with anything in the Bible or Christian tradition (worthy of celebration, anyway).  Believe me, I’ve tried.  I would LOVE to dress me and my family as anything we want and go places and have fun.  I would even settle for avoiding the awkwardness of turning down invitations to “halloween lite”, aka fall festivals.  Or teach my children to stand for what they believe when the other side isn’t dressed up and offering them candy.

I respect the people who see it as “the day the mission field comes to your doorstep”.  But I’m sorry, I’m just not there yet.

I’m not saying I’m some kind of super-saint and have superior knowledge on the matter.  Can you celebrate halloween and love Jesus?  That’s between you and Him.  For me, since I am not sure enough, I would rather err on the side of not offending HIm.

Friday, June 1, 2012

Big News!

I guess you've noticed that this poor little blog has been neglected the past few months.  Truth is, I've had some hopes and dreams on their way to becoming plans; and now, some of those are beginning to be realities!

I've just started a new website - atinyforest.com.  It's just a baby, so don't judge it too harshly just yet.  When you go there, you will see my new blog; over the next few weeks I'll be moving a few tutorials and patterns from this blog to the new one, and will eventually close this one down.

From the new site, you can also get to my new Etsy shop.  I also have a new Facebook page.  I'd love for you to visit those as well.  The new Etsy shop is also fairly new, but there will be more and different kinds of items there in the coming weeks.

Thanks so much for your kindness and support - I hope you'll make this part of the journey with me!

Tuesday, January 3, 2012

preparing for knitting class

Honestly, one of my favorite parts of teaching knitting?  Assembling supplies for my students!  I'm getting ready to teach a class at our homeschool co-op this semester, and I thought I'd share a little of my process with you.
First, I make knitting needles.  I would never send a student out ahead of time to try to find the right knitting needles and yarn, but at the same time I can't afford to buy needles for all of them.  Making the needles saves them (and me) money, until they see if they want to stick with it.  Plus, the wooden needles are not quite as slippery, and that means less dropped stitches.  Besides all that, I just enjoy making them.  I start with dowels, sharpen one end in a pencil sharpener, sand until they're just right, and glue a bead on the other end.  I also rub them down with paraffin to make them smoother.  I'm making them a little shorter this time around, for ease of stuffing into backpacks and such.
I then make up a little pack of accessories - these little printable rulers can be found at MathaTube.  I print them on card stock.  We like to save the in-between strips to use as bookmarks - Lydia loves to decorate them.

I also include a yarn needle and a couple of safety pins.  This time around, I got the bright idea to make little matchbook-style needle books.  It's just a 8 1/2" x 2 1/4" strip of card stock with one end folded under 3/4".  Then I inserted a 4" x 2" piece of card stock in the fold, stapled, and folded the long end up to the staple.  These would look great in printed scrapbook paper for grownups, but I thought the kids would like to decorate their own.  Sorry they're so hard to see in these photos - if you need more information, let me know in the comments and I'll do a tutorial!


I also include a little pair of scissors, and pack it into a ziplock bag so they can keep it all together.  All ready for assembly!


I also give them a 1 oz ball of yarn, and I cast on 15 stitches and work 3 rows in garter stitch with each one in advance. I want them to be able to go straight to knitting, without the discouraging finger gymnastics of casting on.  It's fine with me if they learn that later.  I like to use variegated yarn, because it makes it easier to distinguish between rows.  (Plus, the colors are fun.)  It helps me use up those leftovers I have lying around, plus I often find it at the thrift store or yard sales.  I try to make up extra, so they have plenty to choose from.


Last semester, I gave each student a little tote bag to carry their knitting and supplies.  I noticed that at the end of class, they took the tote bags and stuffed them into their school bags.  Then, of course, all the knitting things would fall out into their school bags, yarn in a big tangle, you get the picture.  This time around, I'm giving them gallon-size ziplock bags for their knitting, and they can stuff it to their heart's content.  Cheaper for me, more practical for them.  :)

I also print out some basic knitting instructions, knowing that as soon as they leave class, they will need a reminder how it's done.  And I wrote up a first "pattern" of sorts, things they can do with that first garter stitch rectangle.  There are three choices and sizes of things to make, so that even the slowest of knitters can make something.  Since I couldn't find it when I needed it, I offer it here, so that if you need it to hand out to a class, you may use it.

Monday, October 24, 2011

the candy holidays

Well, here we are - it's nearly halloween, then Christmas, then Valentine's Day, then Easter.  I call them the "candy holidays," because the celebration of them has evolved into a sickening candy-fest.  There is a special reason I dread them so much:  we have followed a strictly all natural diet, as closely as possible, for 8 years now.  My girls are very sensitive to artificial colors, flavors and certain preservatives.  Their reactions range from ADHD-type behavior to depression.  Sometimes both - think of some bizarre combination of Tigger and Eeyore.

I am very fortunate that they know what they can and can't eat, and stick to the diet on their own, even when I'm not around.  Over the years, they have learned to simply say "No thank you, I can't eat that" when they are offered ordinary candy.  The reactions they get tend to fall into two categories.

One category is pity.  Poor pitiful little deprived things, they can't have M&M's, or a sucker from the bank.  Sometimes people will feel so bad for them, they will try to convince them to go ahead and eat it, Mom won't know the difference.  (ha!)  What these people don't realize is that my daughters are not accustomed to artificial ingredients; that Red 40- and vanillin-laden excuse for candy will taste like a bunch of chemicals to them.  There are real, natural candies out there, and they beat the taste of artificially flavored candy by a mile.  But even if there were not alternatives to artificially flavored candy, I've never heard of a child dying of a candy deficiency!

Another category, believe it or not, is indignation.  As if by politely refusing candy, they are passing judgement on the eating habits of the rest of the world.  Lizi once stood in a buffet line, and asked the server if she knew the ingredients of a certain item.  When she found out the reason, the woman sharply answered "It's not possible to eat all natural all the time!  Everything has artificial ingredients in it!"  I admire my girls for their grace in dealing with such comments; but it is incomprehensible to me that they have had to develop such a skill!  Do you ever wish that grownups would just act like grownups?

Now more than ever, there are children all around us with various dietary allergies and sensitivities.  They don't need your pity, and they certainly don't need your wrath.  So how should you answer a child who can't eat what you would like to give them?  Just say "Oh, I see."  And smile.  Maybe give them a pat on the back and compliment their responsibility.  Or give them a quarter instead of that piece of candy.  Or why hand out candy at all?  Maybe stickers or little toys?  It's not good for ANY of us to make the "candy holidays" all about candy anyway, right?

Saturday, July 9, 2011

the perils of pretty food

I am very fortunate in that my girls love raw fruits and vegetables with no sugar or sauces whatsoever.  So it's a normal occurrence that I peel a carrot to go along with Lydia's lunch.  But on this day, I noticed the pretty ruffly lettuce for our salads - it looked like a fancy dress to me...  I grabbed some toothpicks from the drawer and a bit of broccoli for hair, and voila - a "Veggie Lady!"

Lydia was delighted.  Photos and video had to be taken of Veggie Lady.  Then I said "Okay, now you can eat it!"  "NOOO!  I can't eat Veggie Lady!!!"  Never mind that she's made of healthy, delicious food that Lydia normally loves - now she's too PRETTY to eat.

sigh - should have learned my lesson when they wouldn't eat the heart-shaped sandwiches...

Sunday, June 5, 2011

new socks and birthday gifts

Just popping in to show you a couple of projects.  The first is a birthday gift for one of Lydia's friends.  She asked for a "unicorn pillowcase"; I embroidered a white pillowcase with her name, a unicorn and a rainbow.  I also made her this throw pillow.  She loves hearts and rainbow colors, so the heart print fabric and rainbow trim were perfect.  Seems she really liked it!  The embroidery design may be found here.

And now I get to make an identical set for Lydia.  ;)

I've also started a new pair of socks.  When dear Maya started dyeing commercially spun yarn, she sent one of her first skeins to me.  Since then I've puzzled over just the right project for such a special gift.  I finally settled on this sock pattern.  It is "Sock Hop" by Patsy Leatherbury, published in Creative Knitting magazine July 2006.  It was the first sock pattern I tried to knit, and I loved those socks.  Then we moved into our new house, and for some reason the floors ate holes in all our socks for a while.  Including my very first hand-knit socks, sadly.  I guess maybe it took a while to remove all the fine grit lingering on the floors from the construction?  Who knows.  But there were my beloved socks, with gaping holes in the soles.

I've wanted to knit another pair by this pattern for some time, and it finally occurred to me to use the yarn that Maya sent!  It's from her "Muscadine Sock" line.  This is the "Inked" colorway, one of her first.  I love the color, but also the yarn itself.  I am surprised at how stretchy it has turned out to be; but it springs back into shape, too.  Perfect for socks.  And I'll make sure the floors don't eat them this time.  :)

Friday, April 29, 2011

alive and well

Just reporting in - you may know that some of the tornadoes on Wednesday passed near our home.  Far too close for comfort.  But our house is okay, just some twigs and leaves all over the yard and chairs blown around.  Some of our church members and friends have damage and injuries, but nothing too major.  The only real imposition to us personally is that "our" Hobby Lobby and Big Lots were destroyed, and we will have to drive to another until they are rebuilt.

Our hearts go out to the people who have lost family and friends and property.  At this point, I can't even wrap my brain around the level of devastation.  I keep looking at these photos and videos, and in some cases the destruction is such that it's hard to identify what it even used to be.  I guess I will have to see it in person to believe that places I see all the time will never look the same again.


Saturday, April 23, 2011

the reason for the season

Wishing a blessed and happy Easter to my blog friends.

Monday, April 4, 2011

infestation

It would appear that my lamp is developing a case of the Zoobles.  Anybody know if there's a pesticide or something for that?

Thursday, March 31, 2011

Papyri shawl


Recently I had the opportunity to join my first Knit-a-Long.  Our purpose was to knit the Papyri Shawl (ravelry link).  In the beginning, I feared that I would not be able to keep up the pace of the other knitters.  But as it turned out, I kept up just fine, and I am very pleased with the result!

It is knit in SpringtreeRoad's Muscadine Sock yarn, which is a new favorite of mine.  It is soft, but also durable and easy to knit.  Project bags for the knit-a-long are from Madbird.  It's perfectly sized for most of my projects, so I foresee using it a lot.

Best of all, it's done, and in time for Easter!

Monday, February 21, 2011

water jar cozy

We've recently stopped buying bottled water, and bought a pitcher to filter our water instead.  I have reusable bottles for water, but honestly?  When I'm just hanging around the house, I prefer a pint jar.  The water seems to taste cleaner out of the glass, to me.

Then we were at Starbucks the other day, and I saw a glass water bottle sheathed in some sort of plastic or silicone, to be less breakable.  So I thought, why can I not make a cover for my humble canning jar, so it can go places with me?  And the idea for a water jar cozy was born.

So I'm putting the (very simple) pattern here in case anyone else would like to make one.  You will need about an ounce of worsted weight cotton yarn, a size F crochet hook, and a hair elastic.
Gauge is 15 stitches / 8 rows to 4 inches, in double crochet.

Abbreviations in this pattern:
sl st = slip stitch
ch = chain
sc = single crochet
dc = double crochet

Round 1:  Sl st into hair elastic, ch 3, then dc 35 into hair elastic.  Sl st into top of ch-3.  You should have 36 stitches if you count the ch-3 as a dc.  (This is the top of your cozy.)  Do not turn your work at the ends of the rounds.

Rounds 2-8 - Ch 3, dc in each dc, sl st into top of ch-3.  Again, you should have 36 stitches counting the ch-3.

Round 9:  Now we begin decreases for the bottom.  Ch 3, dc 1, dc 2 tog;  *dc 2, dc 2 tog* to end of round.  Sl st into top of ch-3.  (26 stitches, counting ch-3.)

Round 10:  Ch 3, dc 2 tog; *dc 1, dc 2 tog* to end of round.  Sl st into top of ch-3.  (18 stitches, counting ch-3.)

Round 11:  Ch 3, dc 2 tog; *dc 3 tog* to end of round.  Sl st into top of ch-3.  ( 7 stitches, counting ch-3)  Fasten off.  Use yarn tail to sew up the hole as you weave it in.  Weave in top tail also.

I like a handle on my water container.  If you would like one as shown, make a chain about 2" longer than you want your handle to be.  (Mine is about 15".)  Now you're going to sc on both sides of your foundation chain:  Sc in the back loop of the second ch from hook, and in back loop of each remaining ch.  Sc 5 in end ch.  Turn and sc in the remaining loops of your foundation chain.  Sc 4 in the end loop, and sl st into first sc.  Fasten off.  Stitch the ends very securely to sides of your cozy - if you made your yarn tails long enough, you can just use those for the sewing.
I like this one so much, I think I'm going to make several of them.  I think next I'll make one in a solid color, with an applique of some sort.

If you make one of these, then you are a pattern tester.  :)  Let me know if you find any mistakes, or if you think of a way to make this clearer.

Edited 2-22-11 to clarify abbreviations.


Update:  here's the second, in ecru, with a leaf applique.  The leaf pattern is from Crochet with Raymond, and can be found here.  Here's the ravelry link, if you prefer.

One commenter asked for a photo of the bottom, to help understand the instructions.  Here you go!
(And by the way, these are the same two jar cozies - I'm still using them, almost 4 years later!)

Tuesday, February 8, 2011

just a bit of fun

As you know, I'm not making anything new to sell right now.  But I had a few Pi Guys on hand, so I thought, why not list them?  After all, Pi Day is coming up March 14!  (3/14, get it?)

So if you'd like to see them, click here!  Sold out - thank you!

Wednesday, January 26, 2011

finally finished!


Remember these socks?  It's taken a while because I had to take a break for Christmas gift making, but they are finally done!  They are soft and squishy and wonderful.  I love them from their ribbed cuff down to their little star toes.

Not sure why that one stripe on the left toe came out so wide - ah, the mysteries of self-striping yarn.

The pattern is Embossed Leaves Socks by Mona Schmidt, from the Favorite Socks book.
The yarn is Serenity Sock Weight by Premier Yarns, in the Amethyst colorway.


Check out those puddled jeans - too bad I don't know anybody who does alterations, huh?

Monday, January 10, 2011

nope.

 I love you, but I'm not going down there to make photos for you.  All photos today will be from the porch.

While our friends and neighbors a little north of us were getting lots and lots of lovely snow, we got this:  ice pellets, with a little frozen rain and snow mixed in.  I said it looks like a big slippery sheet of uh-oh, to me.  Including my driveway.
 But the ice on the trees is sort of pretty, though this photo doesn't do it justice.  And I'm just happy we have power, and heat, and water.  We feared that we would not, given the weather forecast.  So I shall stay inside and enjoy them all today.

Monday, January 3, 2011

new student

We are back to homeschool today, after our vacation for the holidays.  We were fortunate to have a new student in class today - Milli from Team UmiZoomi!  The napkin holder made a nice desk.  She already has mighty math powers, but apparently she needs to brush up on her alphabet.

The snack she brought, though, was a can of "boo-boo cream" from Lydia's animal hospital play set - perhaps I should share some of my snack instead?  ;)

Update:  I am so flattered by the requests I have received to make sets of Team UmiZoomi dolls.  Even though it breaks my heart, I turn down these requests due to copyright issues, CPSIA red tape, and lack of time.  My purpose in writing these posts was to gather information, so that we parents could try and fill the gap Nickelodeon has left for us.  I continually refer people to the first and second posts in this series for sewing and crochet pattern ideas.  Hope that helps!

Friday, December 31, 2010

backpack tutorial


Wow, this post has been a long time coming!  I've actually been working on this post for a while, and nearly gave up because it's taken so long.  But I did want to share a more complete tutorial for the blue jean backpack. This is another backpack I made for charity, and I took photos of the steps this time!  Disclaimer:  I've worked on this post in such fits and starts, please let me know if I've left out a step or if something is unclear!

To make this backpack, you will need an adult sized pair of jeans, a little fabric, a zipper, and something to use for straps.  The exact measurements will depend on the size jeans you use, so read through the tutorial to see how much you will need.  Theoretically, you could get two backpacks out of one pair of jeans.

Here you see the jeans, with one leg marked for cutting. I cut off one hem and laid the leg out flat, with the fold at the side seam.  I measured over from the fold to cut the straightest, largest rectangle possible. If your jeans are smaller and you really need the room, you can take out the hem stitching and press it flat for a little more fabric (instead of cutting off the hem). My finished rectangle of fabric, once laid flat, was 17" x 30".  The rectangle will be folded in half, and the fold will form the bottom of the backpack.
Then, cut off one of the back pockets. Instead of taking out the stitching, it's much easier just to cut around it. Leave a little extra fabric for fraying, if you like that look.
Then cut your other pieces from fabric: one piece for the big front pocket, this one was 17" x 12"; and 2 casings, these were 17" x 6".  Note that your pocket and casings should be the same width as your rectangle.  You'll also need a zipper. Here are all the pieces, laid out as they will be assembled. (You will notice that my zipper is too long - that's okay. It will be cut off.)
First, stitch one side of the zipper to the top of the pocket, then flip up and topstitch.  If your zipper is too long, line up one end with the edge of the fabric, and we'll cut off the other end later.  You'll notice that my zipper is a separating jacket zipper, so I had to cut off the bottom end.  Just using what I have on hand, here!
Pin jeans pocket in center of large fabric pocket and stitch around the sides and bottom, following the original stitching lines.
Place pocket assembly on one end of your denim rectangle. Pin in place at top and bottom.
Turn under the bottom edge of the pocket and make a couple of rows of topstitching, so it will be nice and sturdy.  The sides of your pocket will be sewn into the side seams of the backpack, so don't worry about them right now.
Now stitch the top edge of the zipper to the top edge of the backpack. If your zipper is too long, like mine, carefully stitch over the end of the zipper within the side seam allowance. Cut even with the edge of the fabric.

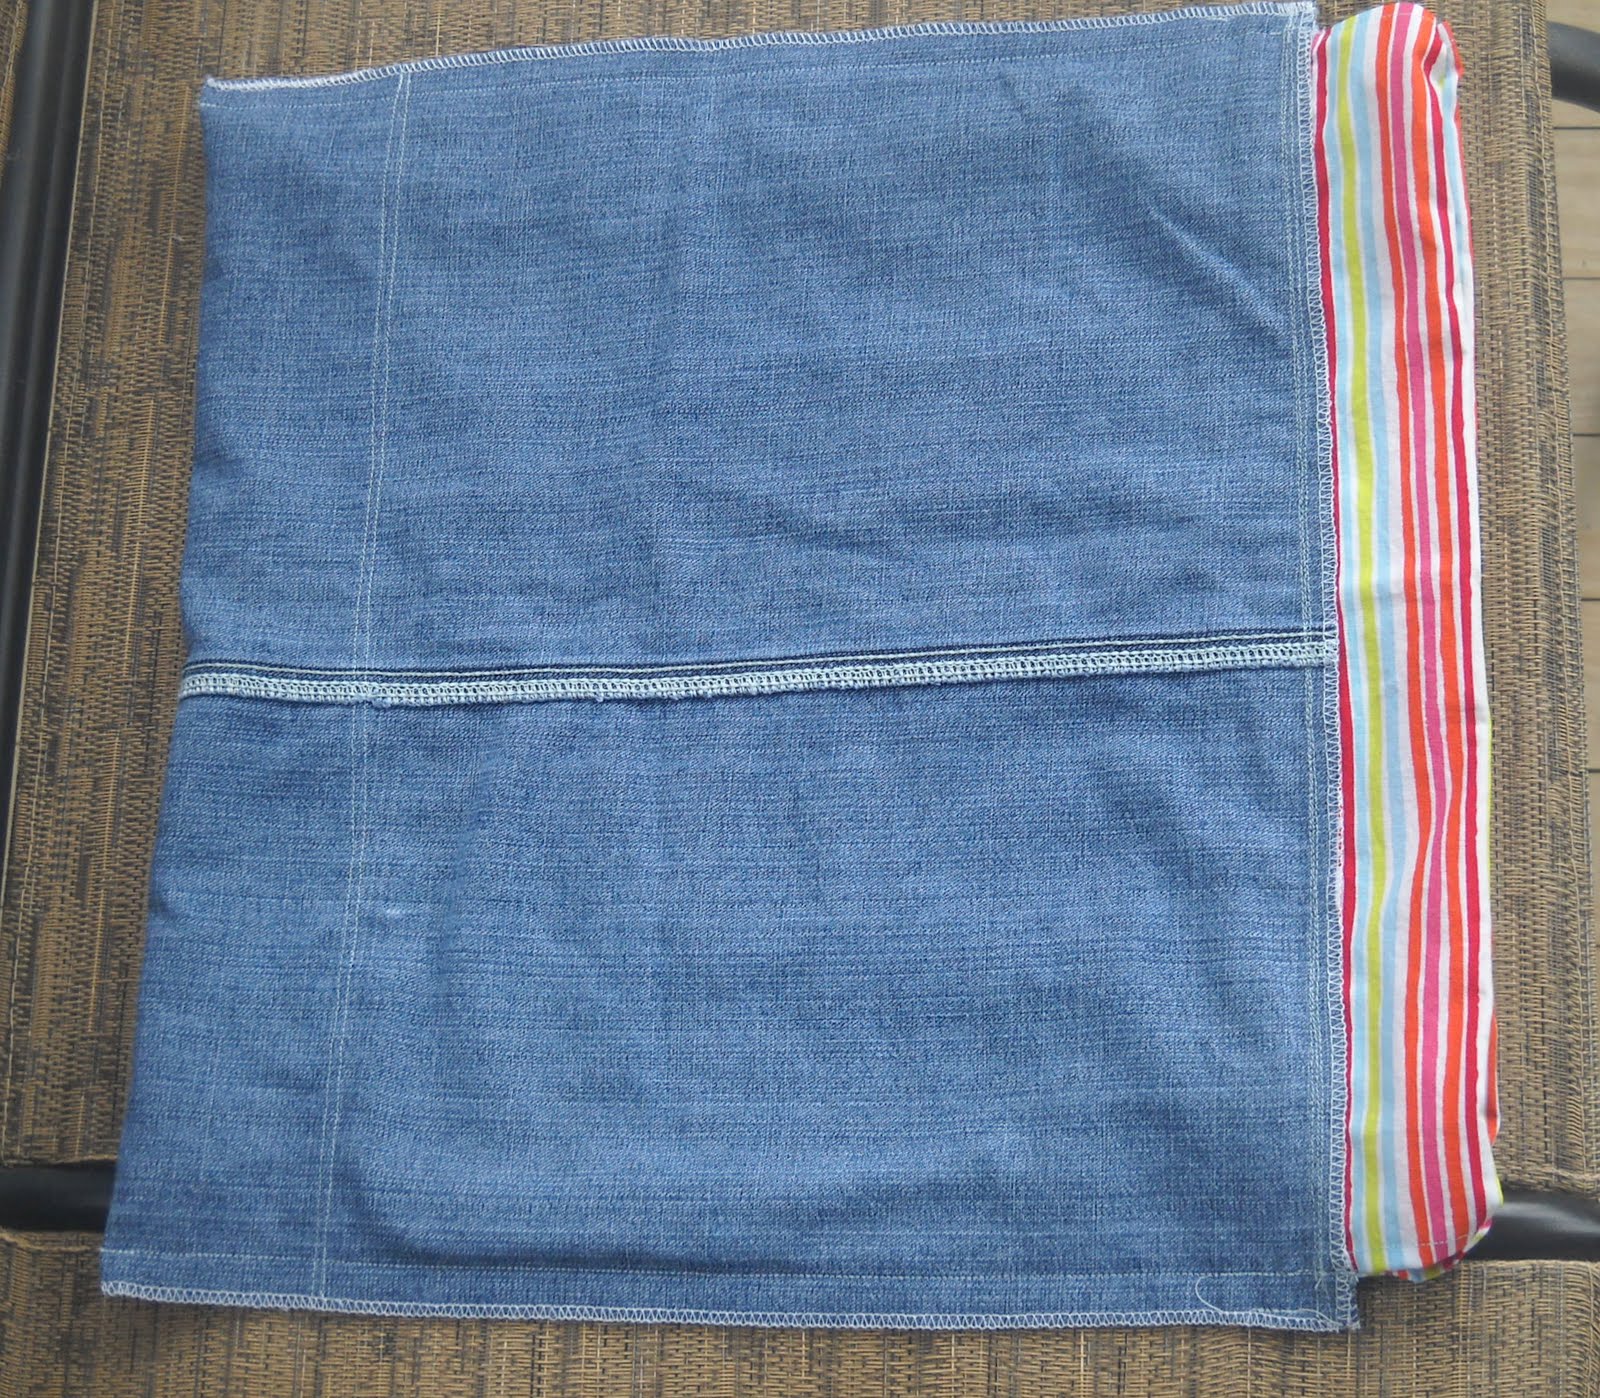
Now, prepare your casings for the drawstring at the top of the bag.  Make a small hem on each short side of your rectangles.  Fold the casing in half, and line up the raw edges with one of the top edges of your backpack.  Be sure to center it - you should have the seam allowance of the backpack extending past the hemmed edge of the casing on both sides.  Sew the seam and finish the raw edges.  Flip up the casing and topstitch.  Repeat for the other casing, at the other top edge of the backpack.

Measure your strap/drawstring.  I am using ribbon here; you may use any kind of sturdy ribbon or trim, or make straps out of fabric.  You will need one piece for each side, and each piece needs to be twice as long as the measurement across the top of the backpack and down the side.  Add just a smidge for a seam allowance.  In my case, each piece is about 66" long.

Run your ribbons through the casings for the drawstring, with the ends of one coming out on the left side, and the other coming out the right side.  Take the ends and baste near the bottom corners, so that they will be attached in your side seam.

Now sew your side seams, stitching a couple of extra times over those drawstring/strap ends.  Finish the raw edges.

Turn right side out, fill with your stuff, and go!

If you make a backpack, please send me a photo or leave a link to a photo of your backpack in the comments!

Monday, December 27, 2010

just so you know...

If you intend to turn on the stove eye with the pot of green beans, but accidentally turn on the eye that has your PLASTIC FLOUR CANISTER sitting on it, this is what happens.

Just thought I'd clear that up.

As I said in my first post, if I can't be a shining example, I guess I'll just have to be a horrible warning.  ;)

Saturday, December 25, 2010

pure joy

Yes, Lydia liked her Team Umizoomi dolls.  :)  (Please excuse the Christmas morning unbrushed hair.)  It's been a good Christmas - it even snowed today, which is unheard of in Alabama.

I hope you had a merry Christmas as well!

Update:  I am so flattered by the requests I have received to make sets of Team UmiZoomi dolls.  Even though it breaks my heart, I turn down these requests due to copyright issues, CPSIA red tape, and lack of time.  My purpose in writing these posts was to gather information, so that we parents could try and fill the gap Nickelodeon has left for us.  I continually refer people to the first and second posts in this series for sewing and crochet pattern ideas.  Hope that helps!

Wednesday, December 22, 2010

and here's Geo!

Whew!  The Team Umizoomi dolls are complete, and with two days to spare!  I am pretty pleased with how Geo turned out.  His suit on the show has a lot of variations in color, but dear reader, I just didn't have the time for that.  Instead, I used a mottled blue fabric and hope it has about the same effect.  And his belt is not a square, as on the show, but again, time.  I don't think Lydia will mind.

And here's the whole "tiny team."  Lydia is going to be ecstatic!

If you'd like to see the other posts about making the Team Umizoomi dolls, with pattern ideas, etc:


Update:  I am so flattered by the requests I have received to make sets of Team UmiZoomi dolls.  Even though it breaks my heart, I turn down these requests due to copyright issues, CPSIA red tape, and lack of time.  My purpose in writing these posts was to gather information, so that we parents could try and fill the gap Nickelodeon has left for us.  I continually refer people to the first and second posts in this series for sewing and crochet pattern ideas.  Hope that helps!

Monday, December 20, 2010

and finally, Bot!

Bot has been slow going - a lot of little details to figure out, and not much time to sneak around and work without Lydia seeing what I'm doing.  Thankfully, Chad kept her occupied for a while yesterday so I could make some headway.  I'm not as thrilled with this one as I was with Milli.  He's too flat - I should have made him more cylindrical.  But it's 5 days till Christmas, and I still have Geo to finish, so he'll have to do.

For more on the Team Umizoomi Dolls project for Lydia's Christmas:  See the finished Milli here.  See the first post and second post with pattern ideas.

See finished Geo here.


Update:  I am so flattered by the requests I have received to make sets of Team UmiZoomi dolls.  Even though it breaks my heart, I turn down these requests due to copyright issues, CPSIA red tape, and lack of time.  My purpose in writing these posts was to gather information, so that we parents could try and fill the gap Nickelodeon has left for us.  I continually refer people to the first and second posts in this series for sewing and crochet pattern ideas.  Hope that helps!